 Posted on 20,Jun |
 Posted by Anne
 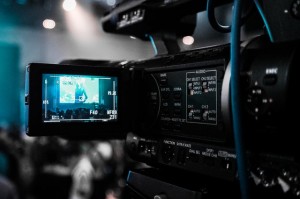 In the nonprofit sector, a lot of emphasis is placed on storytelling, and the importance of using captivating, human interest images to demonstrate the impact made by the work. While it’s essential to tell a thought provoking story that highlights the difference that your work makes, the technical aspects of videography are equally relevant. It’s extremely difficult for your viewers to connect with your mission if they can’t clearly see or hear in your videos. The following techniques will help improve the quality of your videos and make them more compelling and relevant to your supporters!
Framing the Shot
When shooting video, try to avoid focusing on the same spot, or placing all your shots at the same height. Vary your focus to create more engaging video, but avoid the temptation to overuse zoom; don’t pan all over the place, repeatedly. Only use zoom when you are setting up your shot and turn it off once you start shooting.
Use a tripod to eliminate shakiness and blurring, and only move the camera when necessary. If you have manual focus, use it, set the white balance at each location, and always have the sun at your back when shooting video outside.
Create a Shot List
Planning is essential when creating your nonprofit’s videos. Before the event, create a storyboard to help you organise your thoughts, and plan out your video to make sure you capture key elements, and make a list of must-have shots. If you are shooting an interview, take a look at the activities that are scheduled on the day of the event to identify open times for your interviews, and pre-schedule them with your subjects.
Your B-Rolls Should be More Than an Afterthought
While the speakers in your videos convey your message, it’s the candid shots and activities that provide context and clarify the meaning of your NFP’s messages. Focus less on your speakers, and use close-ups of the hands, objects in the background, and activities to break up long speeches and highlight the human element.
Your Background is as Important as Your Main Subject
What’s going on in the background behind the speaker is just as important as the words they are saying. Try to shoot your scenes in areas that are free of clutter, and schedule a time to pre-stage the location to make sure that the background will not distract or contradict from your intended message. While the background is important, avoid using too much backlighting, as it can cause your subject to appear blurry or washed out and bring out unwanted details in the background.
Don’t Forget to Plan for Audio
When you are weighing up the location for your video, take audio quality into consideration as your plan the shoot. Once filming begins, make sure that you place your microphone as strategically close to the speakers in the video as possible. Use an external microphone if you have one. Also, handheld mikes are best when you are conducting an interview. Long runs of cable and moving audio cables mid-shoot will create interference in your videos, so avoid them where possible. Using a wireless mike is the best option in difficult shots if it will help you avoid overly long cable runs.
Charge Up and Pack Backups
Before the event, make sure that you’ve taken the time to charge the batteries or power packs required, and consider packing a backup device, and related equipment in case something breaks or is misplaced during the shoot. This way, you can continue shooting your scenes and not have to go through the delay and hassle of trying to get everyone and everything organised to reshoot the event.
Protect Your NFP
Make sure that you secure a release from all subjects as well as potential bystanders that might be picked up in the background of your shots. Have them sign a consent and waiver form before you begin shooting to protect yourself and your nonprofit legally.


There are no comments yet